In the event of a serious breakdown of the sewing machine, only a competent specialist can help her. Although, in most cases, as practice shows, a complicated repair of a car in operating conditions at home is not required, but in order to be able to use it, it is only necessary to make its adjustment and adjustment. And this can be done on their own, the main thing is to find out and understand how to properly configure the sewing machine before work and what particular details should be adjusted in it.
How to set up and adjust the sewing machine
Major malfunctions requiring adjustment and adjustment
The main problems in the work that require timely adjustment and adjustment can be called:
- instability of the stitch, consisting in the formation of gaps in the line, different lengths of threads, a break in one of them or both at once;
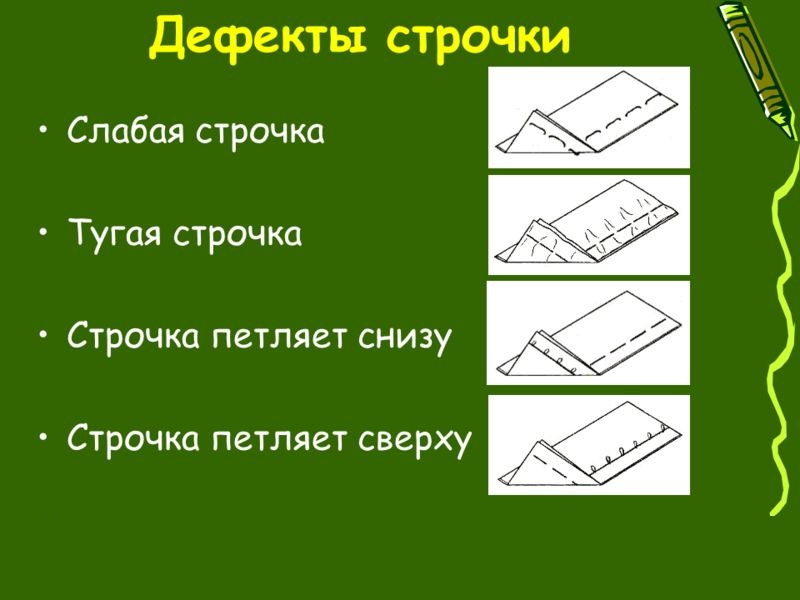
- the manifestation of irregularities in the line, namely tightening the fabric in the form of an accordion, excessive pulling or loosening of the loop, as well as bevelling of the line;
- a change in course, accompanied by noise, the appearance of "heaviness" or jamming.
Stitch instability
The occurrence of all these malfunctions suggests that you need to take a closer look at the sewing machine, determine the cause of their occurrence and try to eliminate it. If you do this at the very initial stage, it will not require much effort. Continuous operation of the sewing machine in the wrong mode may require expensive repairs that only a professional can do.
See also - how to fix the problem if the sewing machine began to tear the upper thread.
Basic rules for self-tuning sewing
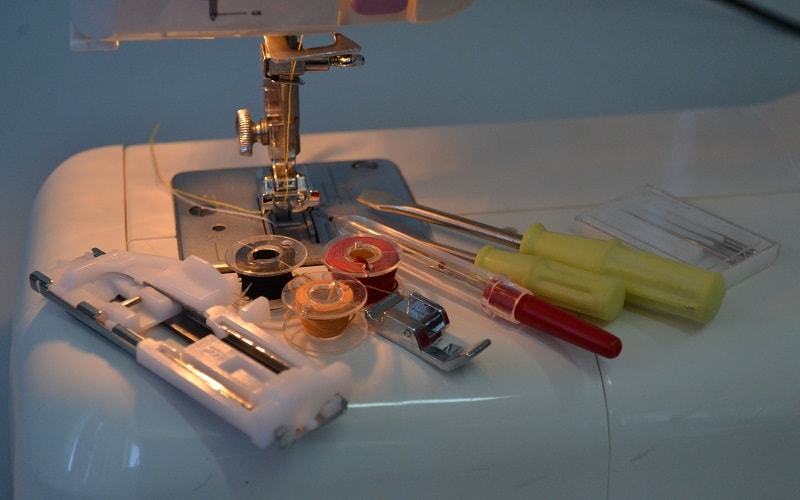
Setting up a sewing machine with your own hands is quite simple. To do this, you must adhere to a certain sequence of actions, the main stages of which are:
- Initially, you must adjust the spring, which is responsible for raising the thread. It must be tightened so that the wound thread can not unwind, holding on to the bobbin cap. In this case, the required tension must be achieved. At the same time, the upper thread, passing through the whole system, should have a sequential path, the steps of which are the thread guide, then the tension regulator and the hole of the thread guide lever, the brackets available and only then the eye of the needle;
- to achieve the correct tension of the threads in the machine for which it is necessary to use the mechanisms that are located on the panel from the end of the sewing machine, as well as in the shuttle screw of the shuttle. In order for the bobbin thread to get the correct tension, it is necessary to tighten the hook screw of the shuttle, which looks like plate-shaped washers;
- after performing these steps, you need to check the operability of the sewing machine, using an unnecessary small piece of cloth for this. If there are hanging loops in the line during the execution of work, this indicates that the upper thread is tightened and it must be loosened. If the seam is even and knots are examined in it, especially those located in the middle and not felt by touch, the sewing machine was set up correctly;
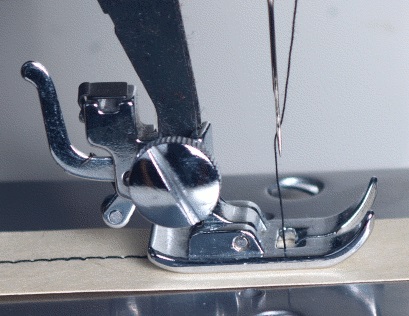
- set the correct pressure of the foot, which is performed by adjusting the corresponding spring with a special bolt. In most models of sewing machines, this bolt is located in such a place that, if necessary, you can immediately tighten it, that is, it is not hidden and its movement in one direction or the other is quite easy. In this case, it is necessary not to pull it and weaken it not very much, catching the “golden mean”. If the foot presses the fabric very strongly against the body, and at the same time this pressure increases with increasing layers of matter, this will make it difficult to move, which in turn can even lead to rupture of matter. An uneven and inaccurate seam will be obtained if the foot does not press the material to the extent that it follows. Adjustment of the foot may be necessary every time before starting to use a new type of fabric having a certain thickness. The thicker the fabric, the pressure on the foot should be greater;

The importance of proper foot pressure
- check the correct functioning of the electric drive. Most often, the normal operation of the sewing machine is prevented by the incorrectly set number of turns, the controller of which is located in the pedal. If during operation, even with a slight pressure on it, the sewing machine “tears from its place”, then often the problem is related to adjusting the sewing speed. In order to correct this situation, it is necessary to disassemble the pedal, clean it and assemble it back. If this does not help, then, most likely, the contacts in the pedal controller have oxidized and require a complete replacement;
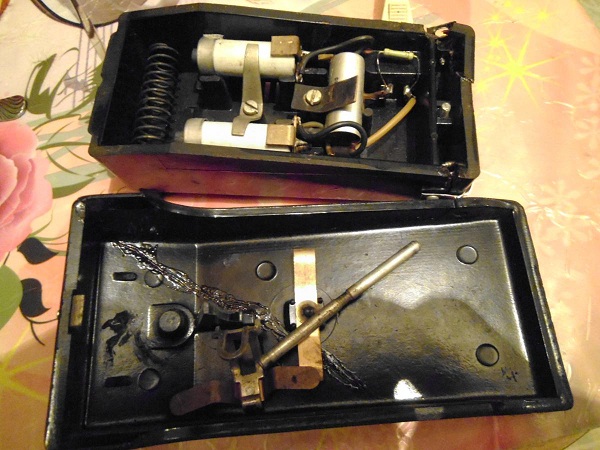
Electric sewing machine pedal
- check the needle holder, in which the needle should be firmly installed in the stop position with a large groove that is turned to the left.
In addition, before starting work, you must set the stitch length. Usually their exact value for various types of fabric and one or another stitch is indicated in the instruction manual of the device. In this case, the average value of this value is equal to from 1 to 2 mm when using thin tissue and not less than 3 mm - thick matter. It is also worth checking the sharpness and consistency of the sewing needle. If the needle is dull or is selected too thin for a particular type of fabric and thread, skipped stitches will occur.
About rating of the best sewing machines You can find out from our article.
Sewing machine needle selection
No matter how strange it may seem, but the needle is one of the most important elements of the sewing machine, so before you ask yourself how to properly configure the sewing machine, you need to check this element. In the process of stitching, the needle makes several hundred punctures of the fabric, some of which are not thin and light. Over time, this leads to its dulling, and subsequently to the fact that it bends. And in that case, if in the process of its movement the needle hits the metal of the body of the device at least once, then the tip will surely collapse. At the same time, inexperienced masters may not pay attention to such an incident and during a visual inspection they will not notice the defect that has arisen. But in fact, it will exist, and when the tissue is punctured, the latter will form relatively large breaks. The thread, which at the same time passes through the eye of the needle, will cling to the deformed point, braking at the same time with the appearance of excess in the stitch. Loops begin to form in the line. In addition, a bent blunt needle can cause continuous thread breakage, especially if the stitching process of a complex section of the product is performed when the upper thread is stretched as much as possible.
In such situations, the adjustment of the manual and electric sewing machine and its adjustment as such are not required. And to perform work in normal mode, you just need to replace the needle yourself. This element in the machine must be changed as often as possible. This will in no way complicate the work, but on the contrary will make sewing truly high-quality and accurate.
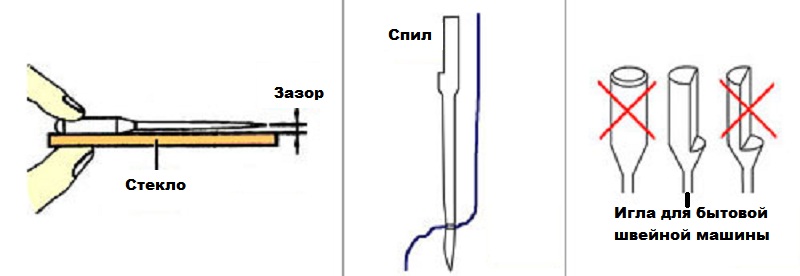
When replacing a sewing needle, it is necessary to choose this element strictly corresponding to the type of machine. In no case should you install a needle designed for an industrial sewing machine. It is extremely difficult to confuse them, since the needles for industrial devices do not have a saw on the flask. Using such a needle in a household sewing machine, the gap between the needle blade and the hook nose is violated, which in the best case leads to the appearance of skipped stitches. And at worst - to damage to the shuttle of the sewing machine. It is also very important that the element is correctly positioned in the needle holder, which consists in finding the blade from the side of the hook nose.
Needle selection and installation
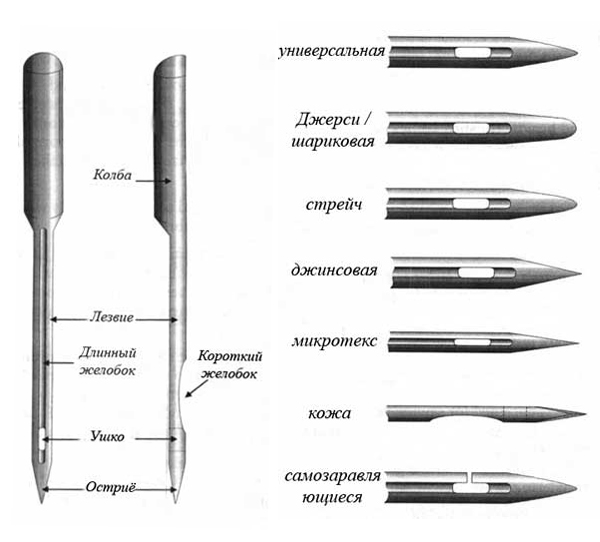
Before even inserting a new needle that matches the look of the sewing machine into the needle holder, you need to make sure that it does not have a curvature that you might not notice at first glance. In order to make sure that the needle is absolutely straight, you can put it on a glass or mirror. The gap will be visible immediately. In addition, you need to choose a needle according to the fabric used. So for sewing “complex” fabrics, such as stretch, jeans or artificial leather, there are special needles that have a special shape that promotes better needle passage through the fabric, thereby eliminating skipped stitches and uneven loops created by the upper thread.
Select the needle according to the number of thread used. At the same time, it is worth considering the feature of new sewing machines, which consists in the presence of a guide stop below the surface of the table, which prevents the needle tip from going sideways. At the same time, the distance from it increases with increasing tissue thickness.
The choice of needle depending on the type of fabric
Configuring the interaction of the needle and the shuttle of the sewing machine
Shuttle and needle work together
The quality of the result during sewing depends on the setting of the shuttle assembly and the needle of the sewing machine, or rather, on the correspondence of the gaps between them to the correct values, in the absence of which gaps, looping and breaks of the lower and upper threads can also occur in the lines. In order to perform this setting, it is necessary to understand the principle of the machine when forming a loop.
So when the needle is raised 1.5-2 mm from its initial position, a loop is formed from the upper thread, located slightly above the eye. In this case, the nose of the shuttle should pass almost close to the hollow of the needle. This distance should not exceed 0.15 mm. The value from the nose of the hook to the eye of the needle should be 0.5 mm. These values are approximate and correspond to work with fabrics of medium thickness. Depending on the type of matter used, they may vary somewhat. To understand their numerical value is possible only experimentally in the process of doing work, and such skills in most cases come with experience.
It is also worth noting the importance of correctly setting the vertical position of the rack. She is responsible for moving the fabric relative to the needle and the body of the sewing machine during operation. At the moment when the needle pierces the matter, the upper edges of the teeth of the staff should be at the level of the working table of the sewing machine.
Proper sewing machine care
In order that each time before using the sewing machine its adjustment is not required, it is enough to follow certain preventive measures, the main of which include:
- lubrication of all main parts should be performed with special oil at least once every six months;
- after each use, the sewing machine must be cleaned from its surface, as well as the shuttle cover and the needle plate, all dust and dirt formed during operation;
- Before you hide the machine in a cover, you need to make sure that there are no torn threads and fabric in its structural elements, as well as putting thick paper or cardboard under the foot, and lower it all the way;
- storage of the sewing machine must be carried out in a case;
- pedal and drive cords should be folded as carefully as possible to prevent twisting and tearing.
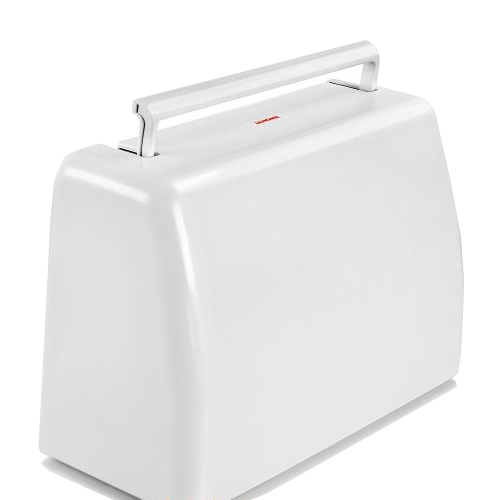
Proper storage of the sewing machine
Also you can read. as thread correctly, needle or bobbin in a sewing machine.
Setting up the sewing machine after a long break in work
If the sewing machine has not been used for a long period of time, then it must be checked and adjusted before use. This is necessary in order to make sure that during the long “standing” all the basic elements and mechanisms did not rust when stored improperly. To do this, lubricate all metal parts of the device with oil, which comes with the sewing machine. If it is not there or it is over, then you can use ordinary engine oil. Further, without lowering the foot, it is necessary to waste it at a low speed, so that all the elements that did not get oil are also treated with it.
After all these steps, you need to replace the sewing needle, and only then proceed to threading and using the device. The first line is best done on a piece of unnecessary fabric, in order to avoid getting machine oil on the material of the product, which will be made using the sewing machine. In this case, it will become clear whether the line goes to bed correctly. After that, you can safely begin to work with full confidence that this device is working properly and will not spoil the main fabric.
Thus, it is quite possible to set up a sewing machine on your own. The main thing is to understand what kind of problem arises in the process of doing the work. All basic operations are standard and apply to both manual and electric sewing machines. If every time before starting to use it, check all the main parts and components of the device, as well as timely carry out preventive measures and correctly use it in accordance with all the points of the operating instructions, then the question of how to adjust and adjust the sewing machine will not arise.
See also why the bottom thread in the line began to loop.
 Top 5 best off-road electric scooters
  TOP-5 electric meat grinder 2020
  12 best electric toothbrushes
  12 best overlocks
  20 best gas hobs